Here I will gather the bits I have found useful for my Fastback and Norton Commandos in general.

Here are dimensions for most of the o-rings (quad rings) you would require
for a Norton Commando:

Description ~ I.D. x cross-section : AS568A- Dash #

Tach Drive ~ 1/4"x1/16" : -010
Timing inspection cover~ 1-1/16"x3/32" : -121
Large primary inspection cover~ 1-3/4"x1/8" : -224
Primary oil level screw ~ 3/16"x1/16" : -008
Swing arm - large ~ 1-5/8"x1/8" : -223
Swing arm - small ~7/8"x1/8" : -212
Transmission shifter spindle ~ 1/2"x3/32" : -112
Transmission gear pointer spindle ~ 9/32"x1/16" ?
Transmission sector gear/camplate spindles ~ 5/8"x1/18" ?
Kick start shaft ~ 1"x1/8" : -214
Headlamp bracket ~ 1-3/8"x1/16": -028
Carb face ~ 1-1/8"x1/16" : -024
Carb needle friction ring ~ 1/32"x1/16" ?

My thanks to Derek for this info.

Commando Tach drive

  1. 06.5201 - Rev Counter (Tach) Gear (new version with groove)
  2. 06.1282 - o-ring
  3. 06.5203 - o-ring - for groove (see above Tach Drive quad ring)
  4. 06.5200 - Rev Counter drive housing

The original Norton Commando rev counter gear does not have a groove in the top. If you buy a new gear, or have the later type, you need the smaller o-ring # 06.5203.

Many opt for a lip seal conversion on the drive housing to avoid o-rings altogether.
seal = chicago rawhide # CR2450


Commando Clutch locking tool

Andover clutch locking tool. Had to file the teeth (center) to get it to fit, handle bent like like a wet noodle.


Norton clutch rod seal

Dave Comeau clutch rod seal.

I was amazed to find the clutch filled with golden flakes of sintered bronze- the result of the sleve gear bush being eaten half away.


See electrical page for 3-phase alternator upgrade.


Heinz Kegler - swingarm lockring.

Heinz Kegler's Swing arm spindle lock rings.

Why?

The lateral forces exerted on the swing arm spindle will oval the tube on the engine cradle, allowing the spindle & swing arm to rock, with the center bold acts as a pivot point. This creates a sloppy rear end and can be felt by grabbing the rear wheel and pushing and pulling side to side.

This mod supports the spindle on both ends, thus eliminating the rocking motion.

An alternative method is to weld nuts to the swing arm tube.

As I had already painted my engine cradle and installed the gearbox and primary, I chose these clamps as a simple bolt on solution.


Initial fitting, here you can also see the oil filter mount.

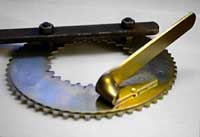
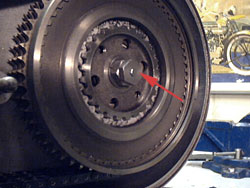
Pilot hole on the right, final hole on the left.

Assembled with grease, thread locker, and some Permatex #2.

Commando swing arm

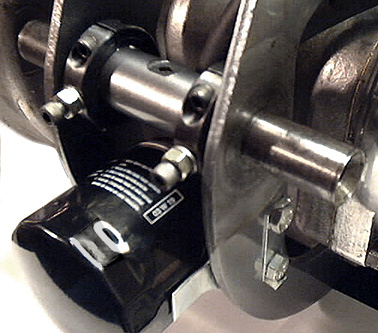
Final installation.

...well almost final. The heads of the adjustment screws hit the swing arm brace, so I turned the heads down, shortened the screws and took the locknuts down to half thickness.


Heinz's instructions specify drilling @ 8 o'clock, this I did, and it is correct..

but it was with the engine on the bench as pictured. When the cradle is installed in the frame the front end sits lower than on a bench, so 8 o'clock becomes 9 o'clock, and 9 o'clock is a problem!

So, when installing: on a bench = 7 o'clock, cradle in frame = drill at 8 o'clock.
Better yet, trim the adjusting screws down so you never have to worry about hitting the swing arm.

You can order a pair from Heinz Kegler himself.


menu 1
menu 2
menu 3
menu 4
menu 5
menu 6